This is default featured slide 1 title

Go to Blogger edit html and find these sentences.Now replace these sentences with your own descriptions.

This is default featured slide 2 title

Go to Blogger edit html and find these sentences.Now replace these sentences with your own descriptions.

This is default featured slide 3 title

Go to Blogger edit html and find these sentences.Now replace these sentences with your own descriptions.

This is default featured slide 4 title

Go to Blogger edit html and find these sentences.Now replace these sentences with your own descriptions.

This is default featured slide 5 title

Go to Blogger edit html and find these sentences.Now replace these sentences with your own descriptions.

LinkLabel trong C#

LinkLabel trong C#


A LinkLabel control is a label control that can display a hyperlink. A LinkLabel control is inherited from the Label class so it has all the functionality provided by the Windows Forms Label control. LinkLabel control does not participate in user input or capture mouse or keyboard events. 

In this article, I will discuss how to create a LinkLabel control in Windows Forms at design-time as well as run-time. After that, I will continue discussing various properties and methods available for the LinkLabel control. 

In Visual Studio 2010, the ToolStripLabel control is recommended for a LinkLabel control.
Creating a LinkLabel
There are two ways to create a control.
Design-time
First, we can use the Form designer of Visual Studio to create a control at design-time. In design-time mode, we can use visual user interfaces to create a control properties and write methods.
To create a LinkLabel control at design-time, you simply drag and drop a LinkLabel control from Toolbox to a Form. After you drag and drop a LinkLabel on a Form. The LinkLabel looks like Figure 1. Once a LinkLabel is on the Form, you can move it around and resize it using mouse and set its properties and events.
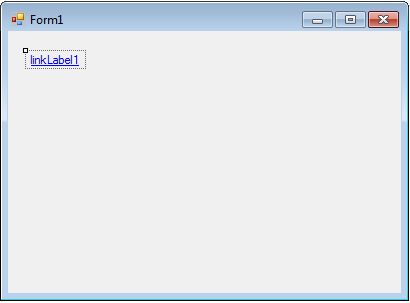
LinkLabelImg1.jpg
Figure 1
Run-time
LinkLabel class represents a hyperlink Label control. We simply create an instance of LinkLabel class, set its properties and add this it to the Form controls.
In the first step, we create an instance of the LinkLabel class. The following code snippet creates a LinkLabel control object.
LinkLabel dynamicLinkLabel = new LinkLabel();

In the next step, we set properties of a LinkLabel control. The following code snippet sets background color, foreground color, Text, Name, and Font properties of a LinkLabel.
// Set background and foreground
dynamicLinkLabel.BackColor = Color.Red;
dynamicLinkLabel.ForeColor = Color.Blue;
         
dynamicLinkLabel.Text = "I am a Dynamic LinkLabel";
dynamicLinkLabel.Name = "DynamicLinkLabel";
dynamicLinkLabel.Font = new Font("Georgia", 16);

In the last step, we need to add a LinkLabel control to the Form by calling Form.Controls.Add method. The following code snippet adds a LinkLabel control to a Form.

Controls.Add(dynamicLinkLabel);  
Setting LinkLabel Properties
After you place a LinkLabel control on a Form, the next step is to set properties.
The easiest way to set properties is from the Properties Window. You can open Properties window by pressing F4 or right click on a control and select Properties menu item. The Properties window looks like Figure 2.
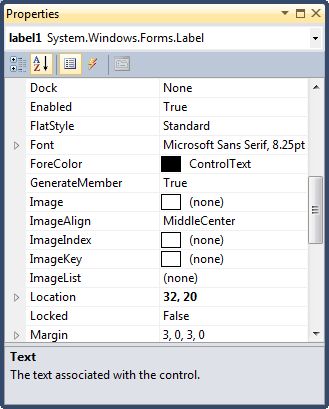
LinkLabelImg2.jpg
Figure 2
Name 
Name property represents a unique name of a LinkLabel control. It is used to access the control in the code. The following code snippet sets and gets the name and text of a LinkLabel control.
dynamicLinkLabel.Name = "DynamicLinkLabel";
string name = dynamicLinkLabel.Name;
Location, Height, Width, and Size 

The Location property takes a Point that specifies the starting position of the LinkLabel on a Form. The Size property specifies the size of the control. We can also use Width and Height property instead of Size property. The following code snippet sets Location, Width, and Height properties of a LinkLabel control.
dynamicLinkLabel.Location = new Point(20, 150);
dynamicLinkLabel.Height = 40;
dynamicLinkLabel.Width = 300;
Background, Foreground, BorderStyle
BackColor and ForeColor properties are used to set background and foreground color of a LinkLabel respectively. If you click on these properties in Properties window, the Color Dialog pops up.
Alternatively, you can set background and foreground colors at run-time. The following code snippet sets BackColor and ForeColor properties.
dynamicLinkLabel.BackColor = Color.Red;
dynamicLinkLabel.ForeColor = Color.Blue;
You can also set borders style of a LinkLabel by using the BorderStyle property. The BorderStyle property is represented by a BorderStyle enumeration that has three values – FixedSingle, Fixed3D, and None.  The default value of border style is Fixed3D. The following code snippet sets the border style of a LinkLabel to FixedSingle.
dynamicLinkLabel.BorderStyle = BorderStyle.FixedSingle;
Font 

Font property represents the font of text of a LinkLabel control. If you click on the Font property in Properties window, you will see Font name, size and other font options. The following code snippet sets Font property at run-time.
dynamicLinkLabel.Font = new Font("Georgia", 16);
Text and TextAlign, and TextLength 
Text property of a LinkLabel represents the current text of a LinkLabel control. The TextAlign property represents text alignment that can be Left, Center, or Right. The TextLength property returns the length of a LinkLabel contents.
The following code snippet sets the Text and TextAlign properties and gets the size of a LinkLabel control.
dynamicLinkLabel.Text = "I am Dynamic LinkLabel";
dynamicLinkLabel.TextAlign  HorizontalAlignment.Center;
int size = dynamicLinkLabel.TextLength;
Append Text 

We can append text to a LinkLabel by simply setting Text property to current text plus new text you would want to append something like this.
dynamicLinkLabel.Text += " Appended text";
AutoEllipsis
An ellipsis character (...) is used to give an impression that a control has more characters but it could not fit in the current width of the control. If AutoEllipsis property is true, it adds ellipsis character to a control if text in control does not fit. You may have to set AutoSize to false to see the ellipses character.
Image in LinkLabel 

The Image property of a
 LinkLabel control is used to set a LinkLabel background as an image. The Image property needs an Image object. The Image class has a static method called FromFile that takes an image file name with full path and creates an Image object.
You can also align image and text. The ImageAlign and TextAlign properties of Button are used for this purpose.
The following C# code snippet sets an image as a LinkLabel background. dynamicLinkLabel.Image = Image.FromFile(@"C:\Images\Dock.jpg"); dynamicLinkLabel.ImageAlign = ContentAlignment.MiddleRight;dynamicLinkLabel.TextAlign = ContentAlignment.MiddleLeft; dynamicLinkLabel.FlatStyle = FlatStyle.Flat;
Hyperlink Properties

Here are the hyperlink related properties available in the LinkLabel control.
Links and LinkArea 

A LinkLabel control can display more than one hyperlink. The Links property a type of LinkCollection represents all the hyperlinks available in a LinkLabel control. The Add method of LinkColleciton is used to add a link to the collection. The Remove and RemoveAt methods are used to remove a link from the LinkCollection. The Clear method is used to remove all links from a LinkCollection.
LinkArea property represents the range of text that is treated as a part of the link. It takes a starting position and length of the text.
The following code snippet ads a link and sets LinkArea and a link click event handler.
dynamicLinkLabel.LinkArea = new LinkArea(0, 22);
dynamicLinkLabel.Links.Add(24, 9, "http://www.c-sharpcorner.com");
dynamicLinkLabel.LinkClicked += new LinkLabelLinkClickedEventHandler(LinkedLabelClicked);
Here is the code for the LinkLabel click event handler and uses Process.Start method to open a hyperlink in a browser.
private void LinkedLabelClicked(object sender, LinkLabelLinkClickedEventArgs e)
{
    dynamicLinkLabel.LinkVisited = true;
    System.Diagnostics.Process.Start("http://www.c-sharpcorner.com");    
}
LinkColor, VisitedLinkColor, ActiveLinkColor and DisabledLinkColor 

LinkColor, VisitedLinkColor, ActiveLinkColor and DisabledLinkColor properties represent colors when a hyperlink is in normal, visited, active, or disabled mode. The following code snippet sets these colors.
dynamicLinkLabel.ActiveLinkColor = Color.Orange;
dynamicLinkLabel.VisitedLinkColor = Color.Green;
dynamicLinkLabel.LinkColor = Color.RoyalBlue;
dynamicLinkLabel.DisabledLinkColor = Color.Gray;

Summary

A LinkLabel control is used to display a hyperlink and can be used to click the hyperlink to open a URL.. In this article, we discussed discuss how to create a LinkLabel control in Windows Forms at design-time as well as run-time. After that, we saw how to use various properties and methods.

MSP430F55xx Development Kit

Giới thiệu

OverView.png
MSP430F55xx Development Kit là một sản phẩm được thiết kế riêng, chuyên dụng, dành cho họ vi điều khiển MSP430F5xx của Texas Instruments. Đây là dòng vi điều khiển với các tính năng vượt trội về siêu tiết kiệm năng lượng, tần số hoạt động cao, tích hợp nhiều tính năng trên một con chip duy nhất. Vi xử lý với kiến trúc RISC, thanh ghi 16-bit và các bộ tạo hằng số cho phép đạt hiệu quả thực thi mã lập trình cao nhất. Bộ tạo tần số dao động nội (DCO) cho phép thời gian chuyển từ chế độ tiết kiệm năng lượng sang chế độ hoạt động bình thường < 5us.
Ưu điểm vượt trội của MSP430F55xx Development Kit là khả năng có thể nạp lại chương trình mà không cần phải dùng mạch nạp hoặc một thiết bị nào khác. Trên kit tích hợp sẵn một cổng USB 2.0 cho phép người sử dụng nạp lại chương trình bằng cách chuyển đổi jump (BOOT) để thay đổi giữa chế độ nạp và chế độ hoạt động bình thường. Cổng USB đó cũng được dùng để kit giao tiếp với máy tính, thư viện lập trình API đã được cung cấp sẵn bởi Texas Instruments.
Các tính năng của MSP430F55xx Development Kit
  • 31 chân giao tiếp ngoại vi.
  • Dải điện áp cung cấp cho kit từ 4.5Vdc – 20Vdc.
  • 2 LED xanh – đỏ có thể điều khiển được. 1 LED báo nguồn.
  • 1 nút nhấn kết nối với chân I/O (P2.0) và 1 nút nhấn reset.
  • Nạp lại chương trình mà không cần mạch nạp hay một thiết bị nào khác.
  • Giao tiếp với máy tính thông qua chuẩn USB 2.0.
Các thành phần chính của MSP430F55xx Development Kit
  • Dây cáp và cổng USB.
  • Thạch anh 32768Hz.
  • 2 header kết nối đực hoặc cái.
  • IC ổn áp nguồn ASM1117 – 3.3v
  • MSP430F5510 với 4 timer 16-bit, bộ chuyển đổi ADC tốc độ cao (> 200ksps), bộ giao tiếp nối tiếp USCI, bộ nhân phần cứng, DMA, bộ đếm thời gian thực và 31 chân I/O.


Cài đặt phần cứng và phần mềm


Cài đặt phần mềm

USB Firmware Upgrade.png
Hai trình biên dịch phổ biến được sử dụng với MSP430 là IAR Embedded Workbench Kickstart và Code Composer Studio(CCS). Cả hai trình biên dịch này đều có bản miễn phí và trả phí. IAR Embedded Workbench cho phép biên dịch đoạn mã assembly với dung lượng mã không giới hạn và giới hạn 4kB mã nguồn C. CCS giới hạn dung lượng mã nguồn C với 16kB. Ngoài ra, còn một số trình biên dịch khác như MSPGCC, Rowley Crossworks. Các bài lab được viết cho kit sử dụng trình biên dịch IAR và CCS. Chương trình để nạp cho MSP430F5xx Development Kit là USB Firmware Upgrade, được phát triển bởi Texas Instruments. Giao diện chương trình được thiết kế đơn giản, chỉ cần chọn file sau khi biên dịch bởi IAR hoặc CCS (*.txt) và nhấn Upgrade. Giao diện chương trình được mô tả ở hình bên. Chương trình kết nối với kit thông qua driver cổng COM ảo. Driver đã được cài kèm theo trong bộ cài đặt của IAR và CCS. Hoặc nếu không có sẵn, driver có thể được tải về tại đây.


Cài đặt phần cứng

Hàn linh kiện
MSP430F55xx Development Kit được thiết kế để người dùng có được sự thuận tiện nhất khi sử dụng. Hai hàng chân kết nối ngoại vi với kit được để trống cho người sử dụng tùy ý chọn kiểu header muốn dùng. Trước khi có thể sử dụng, hai lược (đực hoặc cái) phải được hàn vào hai hàng chân của kit.
Kết nối thạch anh 32768Hz
MSP430F5510 tích hợp sẵn module Real-Time Clock (RTC) cho phép ứng dụng có thể hoạt động với tính năng thời gian thực. Để sử dụng tính năng này, 2 chân XIN/XOUT của bộ tạo dao động UCS (Unified Clock System) cần được cấp xung clock với tần số thấp như thạch anh 32768Hz. Khi chức năng RTC không được sử dụng, hai chân XIN/XOUT có thể được cấu hình để sử dụng như một chân I/O.


Làm quen với MSP430F55xx Development Kit


Làm quen

MSP430F55xx Development Kit đã được nạp sẵn chương trình nháy LED và đo nhiệt độ. Khi kết nối kit lần đầu tiên với máy tính thông qua cổng USB, 2 LED xanh - đỏ sẽ nháy, báo hiệu kit đã được cấp nguồn và hoạt động chính xác. Thông tin chi tiết về chương trình nháy LED được ghi ở mục Các ứng dụng demo.


Các ứng dụng demo

Tại lần sử dụng đầu tiên, để kích hoạt các ứng dụng demo, chuyển jump (BOOT) sang chế độ hoạt động bình thường như hình bên và kết nối với máy tính thông qua cổng USB. Nút nhấn S1 được sử dụng để chuyển từ chương trình nháy LED sang chương trình đo nhiệt độ và ngược lại. Mã nguồn IAR và CCS của chương trình có thể được tải về tại đây.
Chương trình nháy LED
Đảm bảo rằng hai LED xanh - đỏ đã được nối với P1.0 và P1.1 thông qua P1, P2 (shorting jumper). Kết nối dây cáp USB với máy tính. LED xanh và đỏ sẽ chớp nháy liên tục.
Chương trình đo nhiệt độ
Nhấn nút S1 để chuyển sang chương trình demo hiển thị nhiệt độ. Trong MSP430F5510 có tích hợp một module cảm biến nhiệt độ, cho phép theo dõi nhiệt độ bên trong chip. Chương trình này sử dụng module ADC 10-bit để lấy mẫu, tính toán chuyển sang giá trị độ C, F và gửi lên máy tính thông qua cổng USB, chuẩn giao tiếp CDC. Để hiển thị nhiệt độ trên máy tính cần có một chương trình giao tiếp với kit, nhận dữ liệu và hiển thị nhiệt độ. Hình bên mô tả giao diện chương trình connectMSP430temperature. Các bước để sử dụng chương trình:
  • Driver cần được phải cài sẵn.
  • Hệ điều hành Windows XP với .NET framework hoặc Windows Vista trở lên.
  • Chuyển kit sang chế độ hoạt động bình thường (Xem hình 3.3).
  • Kết nối kit với máy tính qua cổng USB.
  • Chọn cổng COM kết nối theo các bước sau: Click chuột phải vào Computer ! Manage ! Device manager ! Ports (COMand LPT). Xem cổng kết nối của: MSP-FET430UIF - CDC. Chọn cổng COM đó tại mục Serial Port của giao diện chương trình.
  • Nhấn nút Start để bắt đầu nhận dữ liệu.
  • Click vào nút Help để xem hướng dẫn chi tiết hơn.

Tạo ứng dụng Visual C++ đơn giản nhất để học C

Tạo ứng dụng Visual C++ đơn giản nhất để học C

Dưới đây là các bước để tạo một ứng dụng đơn giản trong Visual C++. Những hình minh họa là cho Visual C++ 2010 Express, tuy nhiên, những phiên bản khác như Visual Studio 2005/2008/2010, Visual C++ 2008 Express đều có thể áp dụng được (giao diện có thể hơi khác một tí).

Bước 1. Khởi động Visual C++ 2010 Express  

Bằng cách Start → Programs → Microsoft Visual Studio 2010 Express → Microsoft Visual C++ 2010 Express, giao diện của VS10 Express sẽ hiện ra như hình 1:
 
Hình 1

Bước 2. Tạo một ứng dụng rỗng (kiểu Win32)   

Với VS10 Express nói riêng và VS10 nói chung, ta có thể xây dựng được rất nhiều loại chương trình: chạy trên web, trên điện thoại thông minh, trên máy tính cá nhân,... Trên máy tính cá nhân cũng có nhiều loại chương trình: ứng dụng winform (vd: chương trình quản lý nhân sự), thư viện (các file DLL), ứng dụng console (có cửa sổ nền đen chữ trắng như màn hình DOS thời xưa),... Ứng dụng console lại có 2 kiểu: chạy trên nền .NET Framework (CLR Console Application) và chạy trên nền hệ điều hành Windows (Win32 Console Application).
Trong số các loại ứng dụng này, ứng dụng console là đơn giản nhất vì không làm việc nhiều với giao diện (không có nút nhấn, không có hộp thả xuống, không có các biểu tượng hình ảnh đẹp mắt,...), do đó, nó rất thích hợp cho những newbie (tân binh) mới chập chững bước vào thế giới lập trình. Do với mục đích là HỌC nên chỉ sử dụng những chức năng cơ bản nhất, không cần những tính năng của mạnh mẽ khi viết trên nền .NET Framework, do vậy tôi chọn kiểu Win32 Console Application.
- Để bắt đầu việc tạo một solution (tạm dịch thoáng là "ứng dụng") mới, ta có nhiều cách để làm.
Cách 1: File → New → Project.
Cách 2: nhấn tổ hợp phím Ctrl + Shift + N.
Cách 3: trong vùng Start Page (khi VS mới khởi động), kích vào New Project.
     
Hình 2
- Trong cửa sổ New Project, đầu tiên kích chọn loại ứng dụng là Win32 [1]Win32 Console Application [2], sau đó gõ tên và thư mục chứa ứng dụng [3]. Chú ý: nên kích chọn Create directory for solution [4] để VS tạo một thư mục có tên là tên của ứng dụng và sẽ đưa tất cả những tập tin liên quan vào thư mục này (để dể quản lý). Cuối cùng, kích nút OK.
 
Hình 3
- Cửa sổ tiếp theo (Win32 Application Wizard) không có gì quan trọng. Kích nút Next để tiếp tục.
 
Hình 4
- Trong cửa sổ cuối cùng, trước tiên phải cọn loại ứng dụng là Console applicaton [1], sau đó bỏ chọn mục Precompiled header [2], chọn Empty project [3] và kích nút Finish [4] để VS bắt đầu tạo khung ứng dụng kiểu Win32 Console "rỗng".
 
Hình 5
- Thành quả của bước này sẽ như hình dưới đây: một solution (ứng dụng) chỉ có 1 project (dự án) và trong dự án này chỉ có 4 thư mục rỗng. Công việc tiếp theo sẽ là đưa thêm gì đó vào cái khung rỗng này để có được một chương trình "chạy được" :-)
 
Hình 6

Bước 3. Thêm mới một tập tin mã nguồn C/C++   

Kích phải vào hàng thứ 2 trong cửa sổ Solution Explorer, chọn Add → New Item.
 
Hình 7
- Trong cửa sổ Add New Item, trước tiên, kích chọn ngôn ngữ của ứng dụng (là Visual C++) [1], sao đó chọn loại tập tin sẽ tạo (là C++ File) [2], nhập tên của tập tin [3] và kích nút Add để VS bắt đầu tạo tập tin C để "gắn" vào ứng dụng.
 
Hình 8

Bước 4. Viết mã và Biên dịch chương trình   

Kích đúp vào tập tin mới tạo sau đó nhìm vào phần trung tâm của Visual Studio, bạn sẽ thấy 1 vùng rỗng (tab) có tên là tên của tập tin (ở đây là ChaoC.cpp). Đây chính là nội dung của tập tin này. Tiếp theo, chúng ta sẽ viết một chương trình C đơn giản nhất vào đây. Chương trình chỉ có một công việc đơn giản là hiển thị một dòng chào mừng: "Chao C! Chao Visual C++ 2010 Express!". Nhập nội dung chương trình như hình dưới (vùng [1]) và kích chọn Build → Build Solution hoặc nhấn phím F6 để biên dịch chương trình. Kết quả biên dịch được hiển thị ở cửa sổ Output [2]. Liếc nhìn hàng cuối cùng của cửa sổ Outputthấy "1 succeeded, 0 failed" nghĩa là đã biên dịch thành công, sẵn sàng chạy chương trình :-)
 
Hình 9

Bước 5. Thực thi chương trình  

Kích chọn Debug → Start Debugging (hoặc nhấn phím F5) để thực thi (chạy) chương trình. Kết quả chỉ đơn giản là một dòng chữ chào mừng màu trắng trên nền đen.
 
Hình 10
Đến đây coi như xong viết xong một ứng dụng C đơn giản nhất trên Visual C++ 2010 Express. Để làm các bài tập khác về C, chỉ đơn giản thay đổi nội dung chương trình ở vùng [1] trong bước 3 (Viết mã và Biên dịch chương trình).
Chúc các bạn sinh viên có một sự khởi đầu suôn sẻ.
Chúc mọi người học lập trình vui :-)
Visual C++